
August Update
Second edition - this could be worth even more than the first edition! There's a bunch of videos, some interesting links, and we've got a long form article for you. Read on and enjoy!
this edition was edited by: @atomic14
Things to Watch
My wife kicked me out of home...
Vlog series of me packing up my garage-based maker workshop and moving it all into a bigger space - with lots of extra room for all of their toys I'll never buy! It's going to be awesome! I've not even moved in yet and Yuz has claimed my old space already!!!!!
Will it run doom?
It’s the age-old question that must be asked of any computer. James Sharman attempts to answer it for his homemade 8 Bit pipelined CPU.
A Glimpse Behind the Curtain
atomic14 gives you a little peak behind the curtain of one of his most successful videos (in fact - his only successful video!) and asks - “Why was it successful?”
Haptic Baby Monitor
Guy Dupont doesn’t just want to hear the baby crying, he wants to feel it!
This Takes Overengineering to a New Level
Jigsaws can be frustrating and I’ve often thought of building a robot to solve them for me. But I never envisaged anything as complex as this - it’s a thing of beauty.
Have you ever been asked, “Can you help me edge light my piece of glass?”
Well, The Embedded Hobbyist has - and he’s also got an answer to the question!
Steampunk Analyzer as NIXIE doppelganger
by Mark Donners
Did you know that there are Nixie tubes that can be used for bar graphs (IN-9 and IN-13)? If you building a 10-channel analyzer you’ll need to purchase 10 of them - and that’s going to be pretty expensive. You’ll also need a high voltage supply which isn’t going to play nicely with your microcontroller. Let’s create a safe alternative that still looks as good as the original nixie tubes. Best of all, it’s open source!
MakerCast Episode 43
It’s the monthly MakerCast show on the 4th Sept!
Things to Read
Planets as food
I saw this on Twitter and the images looked absolutely gorgeous - so I just had to share them with you:

Amazon Wants to Clean Your House
Amazon has gone a bit crazy and decided to buy Roomba for a whopping $1.7 billion! Bet you all wish you’d started a robot company now.

A Politician Who Can Write Code
Politicians often get a bad rap for not understanding technology, so it’s nice to find one who can actually write code. Let’s have a look at a sudoku solver from the Prime Minister of Singapore - Lee Hsien Loong.

Not all PCB Projects Need to be Complicated
We see a lot of really complex PCBs, but sometimes simple is good. Just look at this thing of beauty from arturo182 - it’s simple and effective.

Things To Try Out
Have you ever wanted to get your own chip manufactured?
TinyTapeout is an educational project that aims to make it easier and cheaper than ever to get your digital designs manufactured on a real chip!
Right now, we have a demonstrator and we want to start getting feedback. If you submit a design then there's a good chance we'll get it made on the next Efabless ASIC shuttle and in your hands!
You will need a little knowledge of digital design to take part. It will eventually have full course material but right now we want to test the tools and infrastructure with early adopters.
The Long Read
Quadrupedal Gaits
by Radomir Dopieralski
How to make a four-legged robot walk without stumbling or dragging its legs?
Walking robots are really great – there is something about this mode of locomotion that makes them look much more alive than wheels or tracks. And especially four-legged robots are dear to our hearts, as they look like pets the most. However, most desktop-sized quadrupeds you can see on the Internet don't really walk properly – they either crawl, dragging their feet and convulsing in a way that somehow makes them move forward on certain surfaces, or they make very fast very small steps, stumbling in all directions. Why is that? Is it really so hard to make a robot walk properly, with its feet planted firmly on the ground, and with proper, long steps? Is there some kind of a trick to it?
If we want to understand how a robot – or an animal – can keep its balance, we have to start with the support area. What's that? It's an area on the floor delimited by those feet of the robot, that are firmly placed on the floor. If you place your feet on the ground, and then draw lines between your left and right toes, and between your left and right heels, the area delimited by those two lines and the outsides of your feet is your support area. For a quadruped robot with pointy feet it's even easier – you just connect the points where the feet touch the ground with straight lines. If any of the legs is not touching the ground, you skip it. And the rule for statically stable gaits is very simple: for the robot not to fall, the center of gravity of the robot must always be above its support area. (This is a simplification, because we are ignoring the inertia here, as our robot is so small and light, that it hardly matters. With bigger robots you don't just look at their center of gravity, but at so-called zero-movement point, which takes inertia into account.)

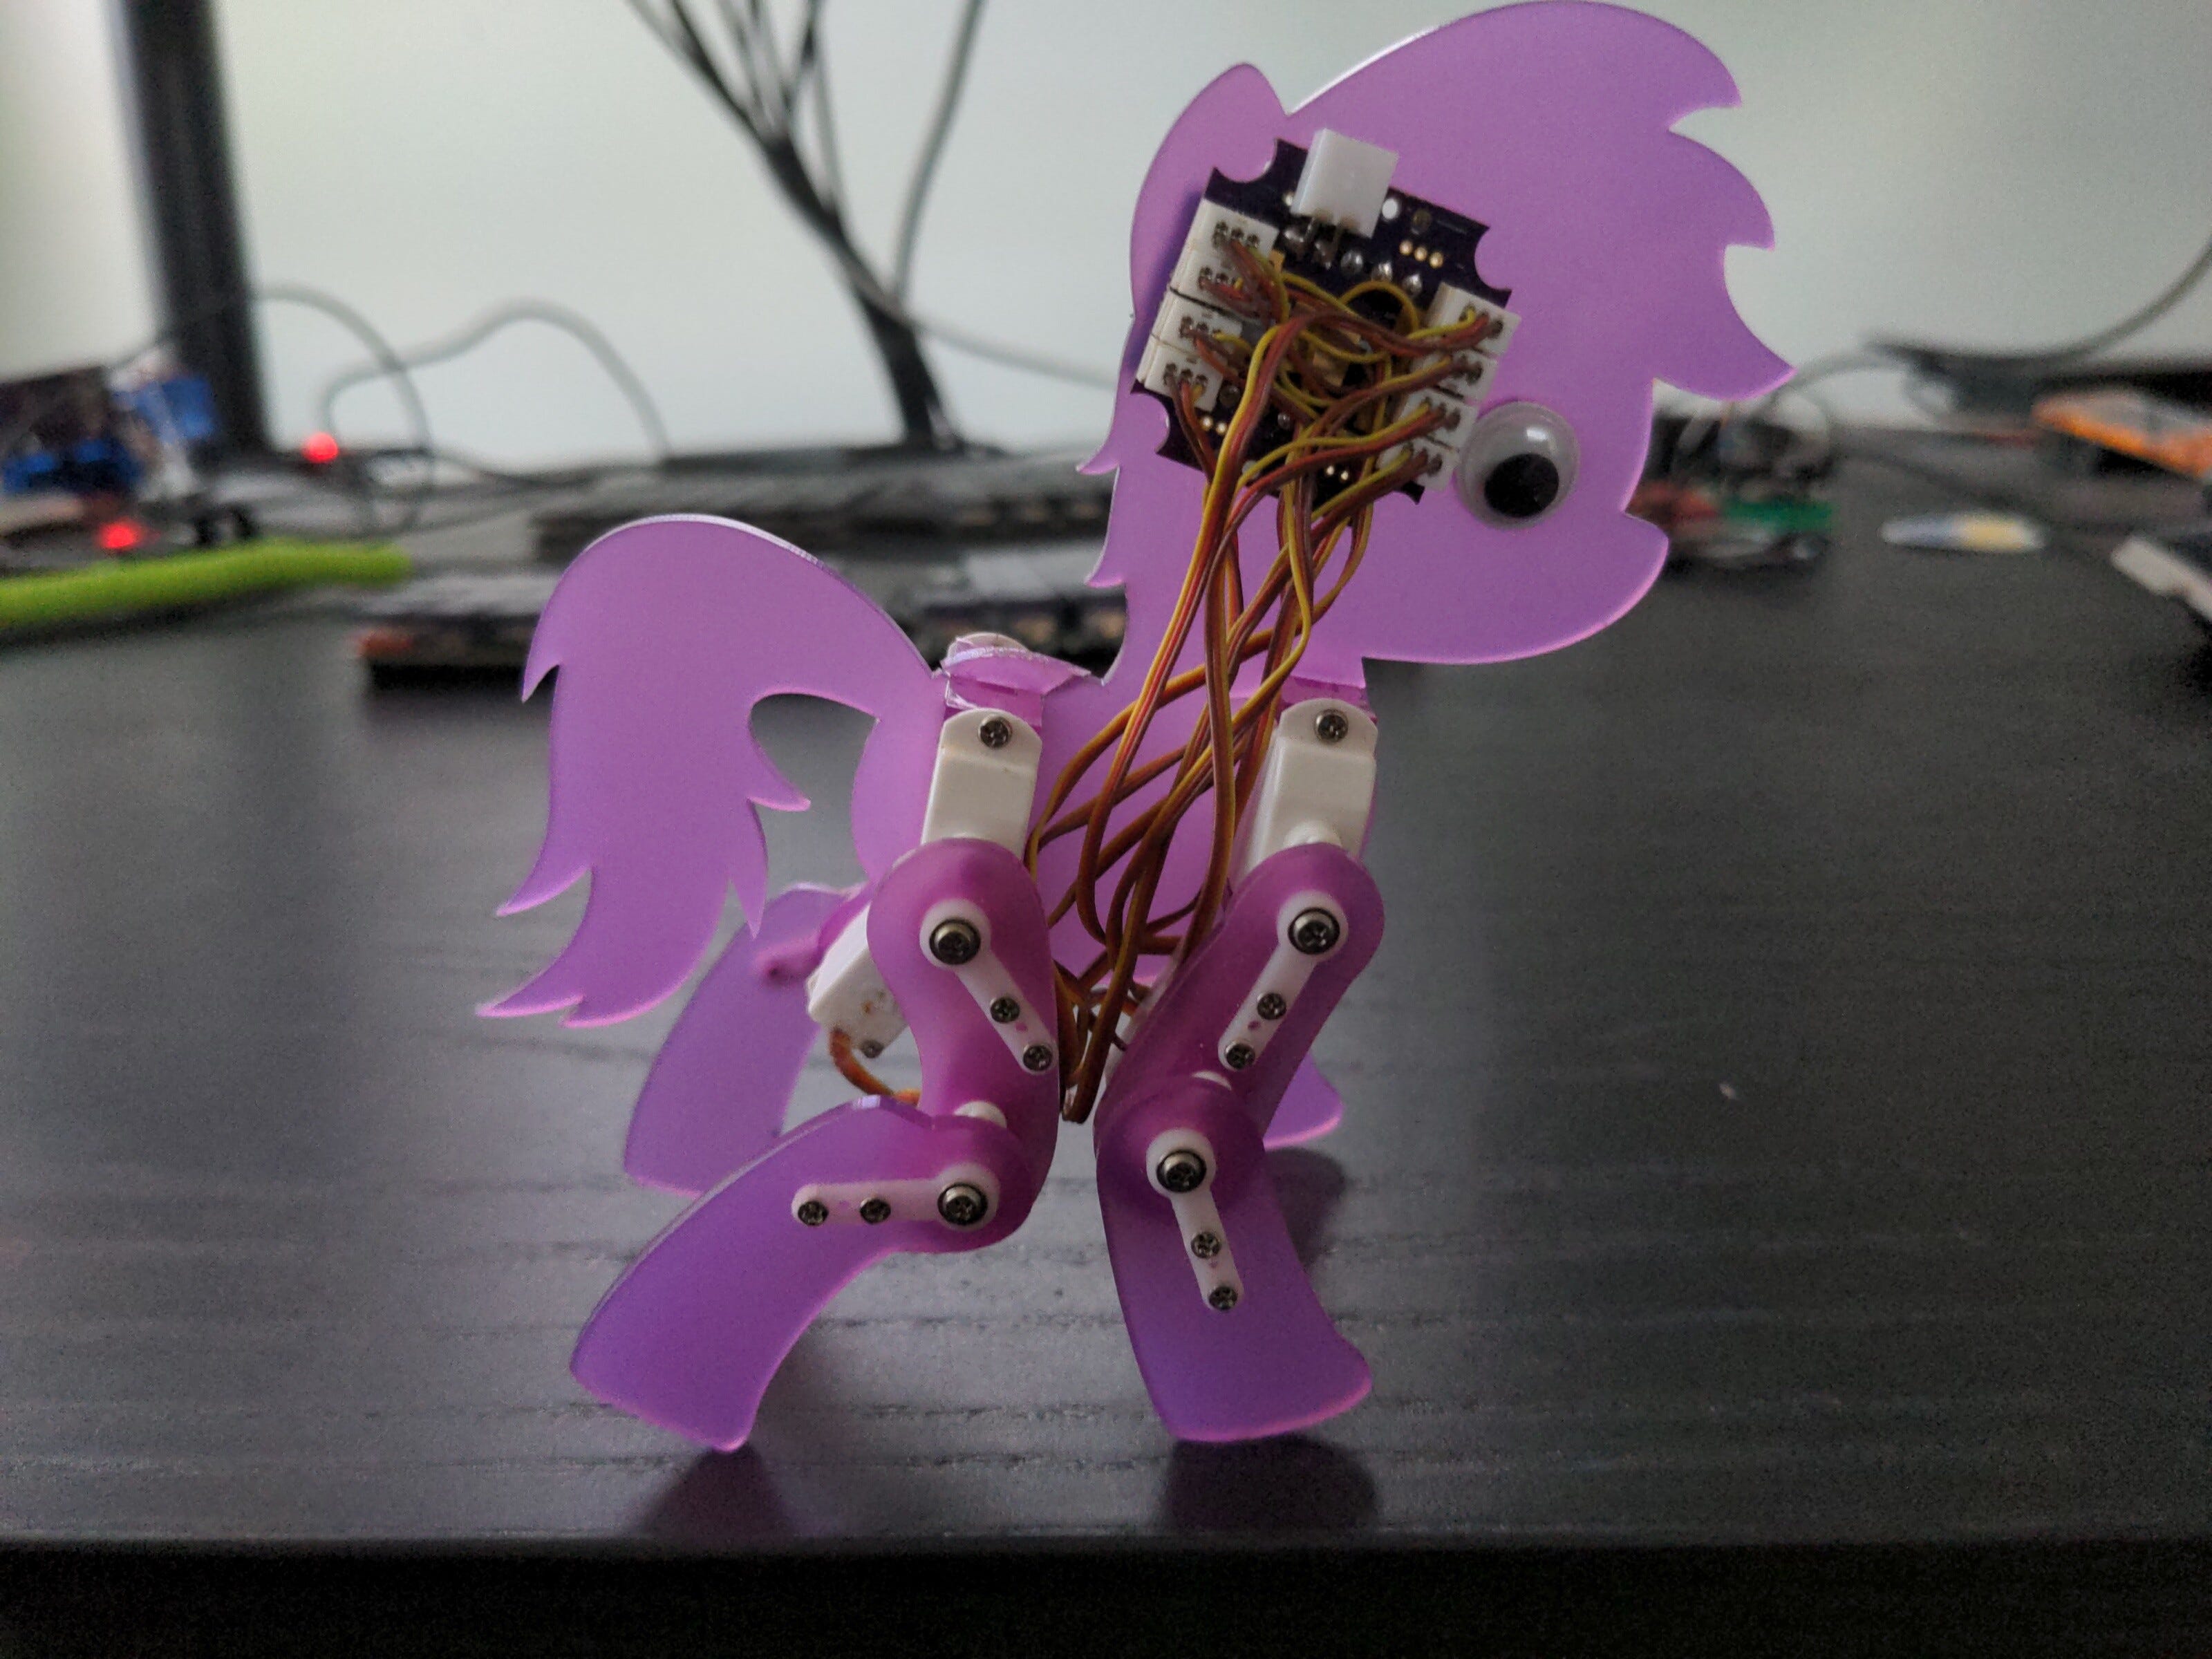
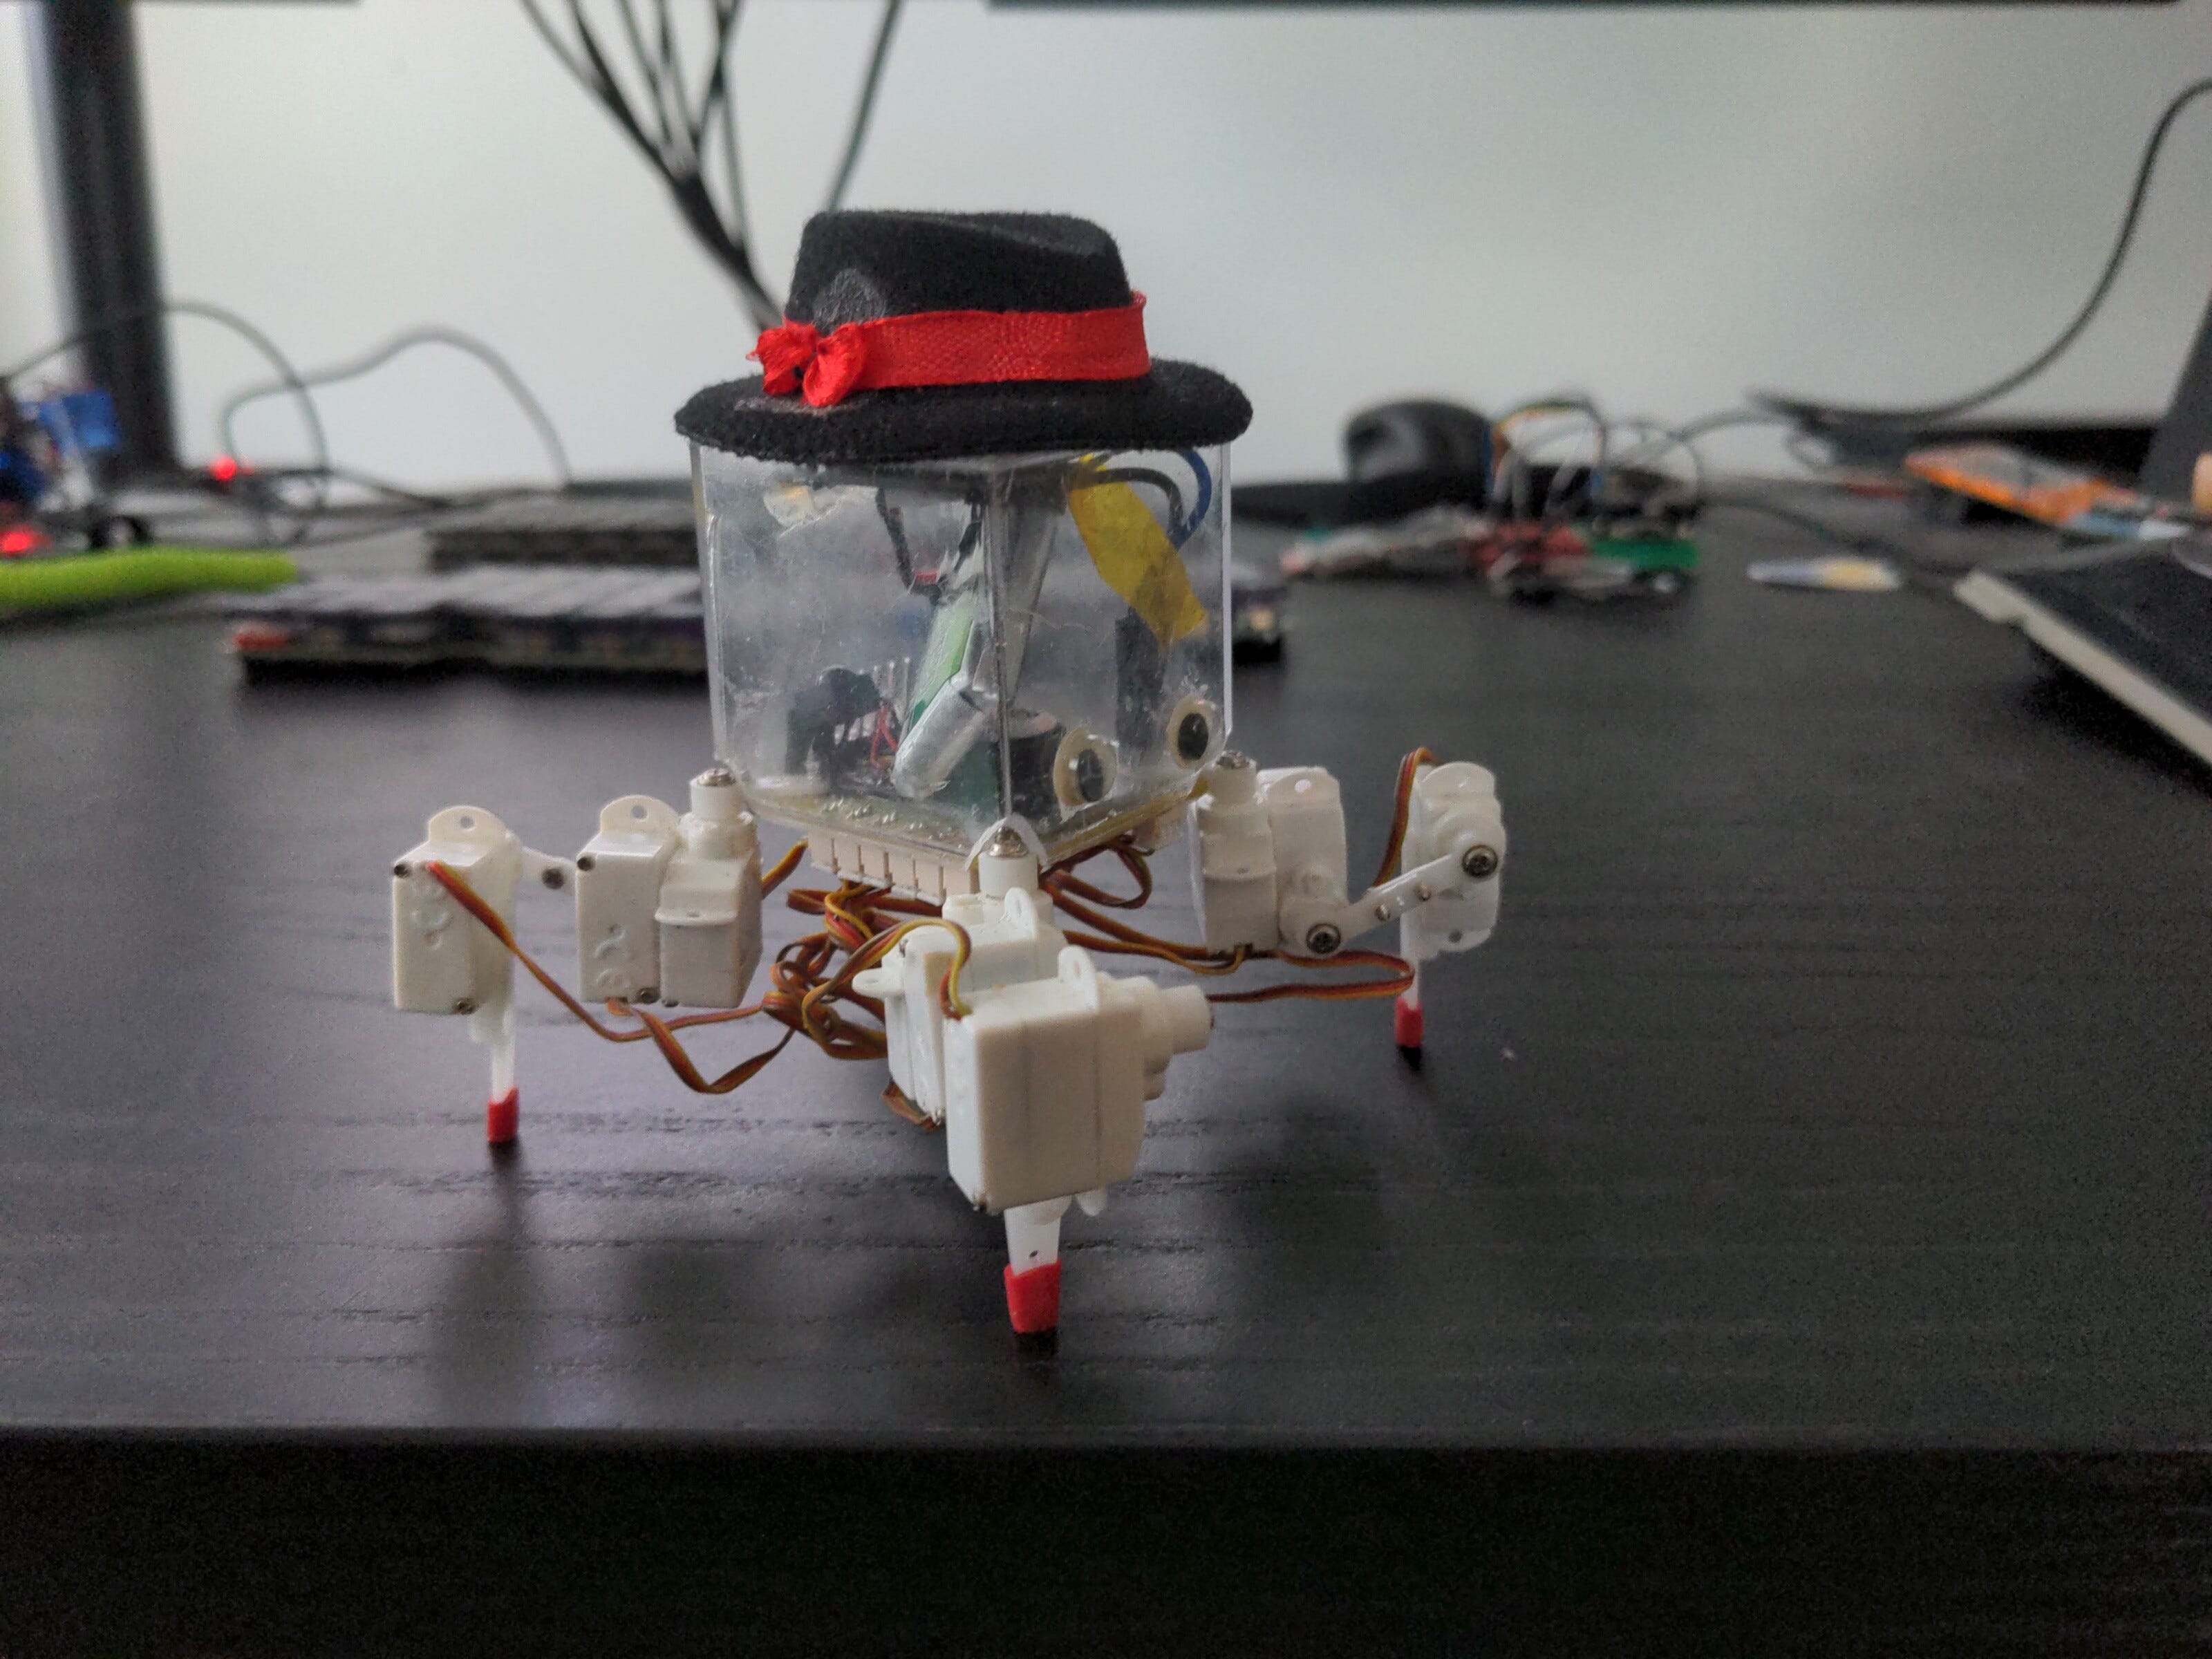
With that rule in mind, and the realization that to walk forward you simply have to push your legs backward, and quickly raise and move them forward before your center of gravity leaves the support area, we are ready to design our robot. The very first requirement that comes from this is that the robot should be able to move its legs backwards in a straight line. That immediately rules out many designs with two servos per leg, where one servo moves the leg up and down, and the other moves the leg in an arc around the robot. There is no way to move such a leg in a straight line backwards, so it will always drag its foot while walking. To get a straight line out of rotating movement at least two joints must move in the same plane, so that their combined movement cancels out any sideways component. Since the robot also needs to be able to move the leg upward, this leaves us with either two servos per leg in a mammalian or insectoid configuration, or three servos per leg (see the photos below). The latter, while more complex and heavier, also lets the robot move its feet sideways, making it much easier to turn.

The second requirement is that we need our robot to be able to raise at least one of its legs without falling down. That means it has to be able to move its center of gravity to always be over the triangular support area formed by the remaining legs on the floor. The easiest way to achieve that is to move the body of the robot away from the leg that it is supposed to raise, before it actually raises it. With three servos per leg this is easy, with just two servos per leg we need to tilt the body a little – it helps if the center of gravity of the robot is high, so that just a small tilt will move it enough. There is also a trick in making the steps in one specific order of the legs, that maximizes the stability – it's called the crawl gait, because it's how cats walk when they are sneaking towards their prey. It goes hind left, front left, hind right, front right (or the mirror reflection of that, see the animation below). If the robot keeps that order, we will only need to shift its body very little.

So this already gives us some idea about how the robot needs to look like. But how are we actually going to move those legs in straight lines, or move the whole body of the robot, when all we can do is set an angle on a servo? This is where inverse kinematics come in handy. It's a way of calculating the angles of the leg's servos given the desired position of its tip. For relatively simple legs with just two or three joints, we can calculate inverse kinematics with just simple trigonometry – you usually only need the Pythagorean Theorem and the Law of Cosines to solve the triangle formed by the tip of the leg and its two joints. The angles of those two joints are the angles to which you need to set your servos. With this, you can easily translate the coordinates of a single leg into the servo angles. And to move the whole body of the robot, you just move all the legs in the opposite direction.

With all that, we can have our robot walking in no time. At every tick, it needs to move all the legs that are on the ground backwards a little, and away from the leg that is furthest back. Then it needs to raise that leg, move it forward, and put it back on the ground. And then repeat the whole process for each of the legs, in the creep gait order, all the while moving the other legs backwards. The speed depends mostly on how fast you can make that step forward and tilt the body – because that limits the rate at which you can move all legs backwards.
But can you move any faster? Well, not if you want to remain statically stable, that is, if you want to be able to freeze at any moment and remain balanced. If we remove that constraint, suddenly we enter a whole new world of dynamically stable gaits, which is unfortunately too complex to cover here. Just as a trailer, though, we can talk about the trot gait. Trot is when the robot moves two legs at the same time, diagonally opposite each other. So for example front left and hind right. And then front right and hind left, alternating. Of course, the support area immediately becomes a line, and the robot will inevitably start tilting to one side or the other, but the trick is to move those legs fast enough that there is no time for the robot to fall. As there is no need to move the body away from a leg, and you move two legs at a time, you can imagine that the trot gait is much faster than the creep gait – at least twice as fast, if not more.
Adding sensors to your robot – an inertial sensor, a torque sensor in the motors or force sensors in the feet – allows you to estimate the exact position of the zero-movement point, and to balance the robot even when the support are is a line or a point. That opens the door to even more advanced gaits, but also requires much more advanced calculations.
That's all I have for now. Hopefully, it can get you started on your robot adventure, or at least make the first statically stable steps.
Final Thoughts
So, that’s it for the second edition - thanks for reading, we really appreciate the fact that you’ve spent some precious time on our content.
Fun made-up fact - only 5% of newsletters make it to their second issue! Help us to continue the good work by subscribing and sharing this post with all your friends!
Thanks Ed! Packed with interesting stuff - look forward to the next one.